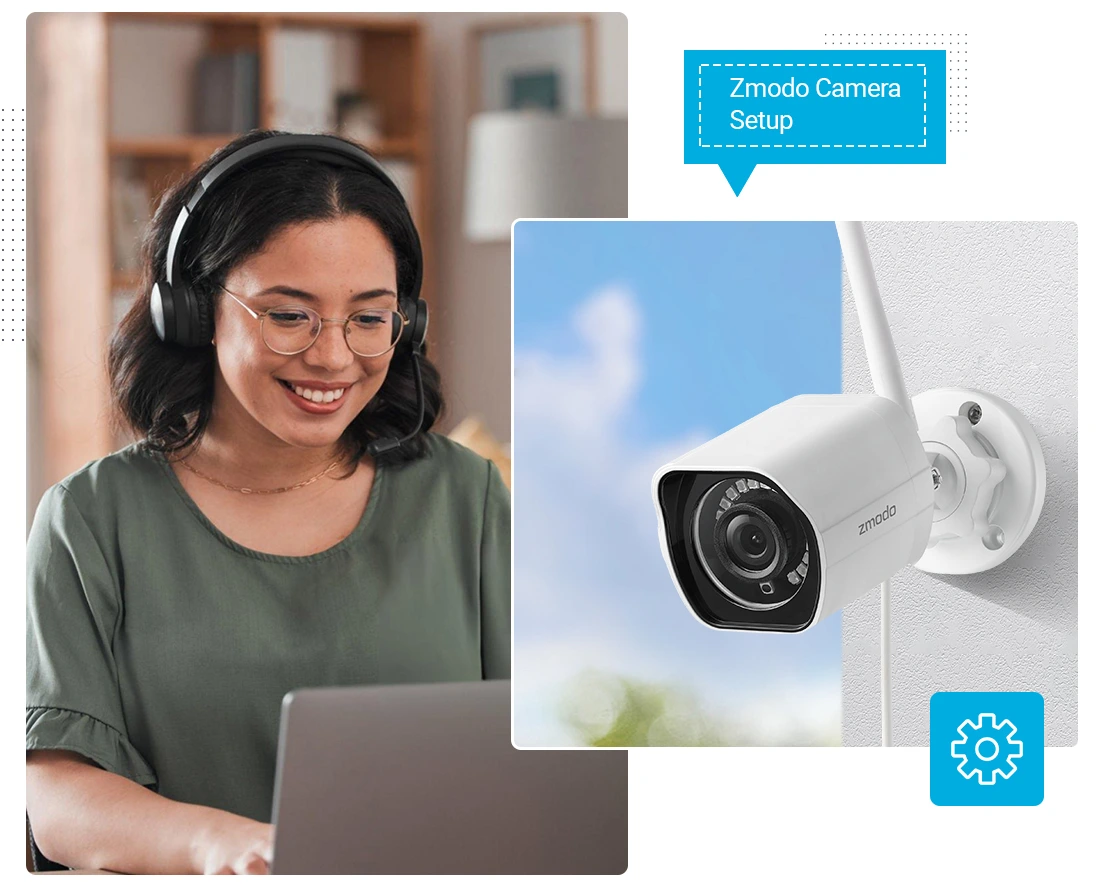
Read Here the Easy Zmodo Camera Setup
Generally, Zmodo security cameras are top-notch security devices that are sleek in design and equipped with advanced wireless technology. Therefore, to experience such functionalities, you must execute the Zmodo camera setup first. It is also necessary to manage and configure the security device according to your preferences.
In addition, there are three different methods that you can use to carry out this configuration procedure. You can proceed with the Zink link, Zmodo app, and the web address method. If you do not know how to perform Zmodo camera wireless setup, then you must walk through this brief guide. Here, you find all the detailed information regarding the camera setup of the Zmodo brand.
Prerequisites for the Zmodo Camera Setup
Further, to access the Zmodo surveillance devices to their full extent, setup is a must. So, before you proceed with the procedure, ensure to have the below-mentioned things with you:

Wireless/Wired Zmodo camera

An active Internet connection

Zmodo app

Web Address

Computer /Smartphone

Ethernet cables
How to Setup a Zmodo Camera?
Moreover, you are now aware of what are the primary requirements to begin with the Zmodo setup camera process. Likewise, it is time to understand and shed light on the various methods to bring your camera to work to its fullest and set it accordingly. In this section, we explore each method using simple steps, so have a look beneath:
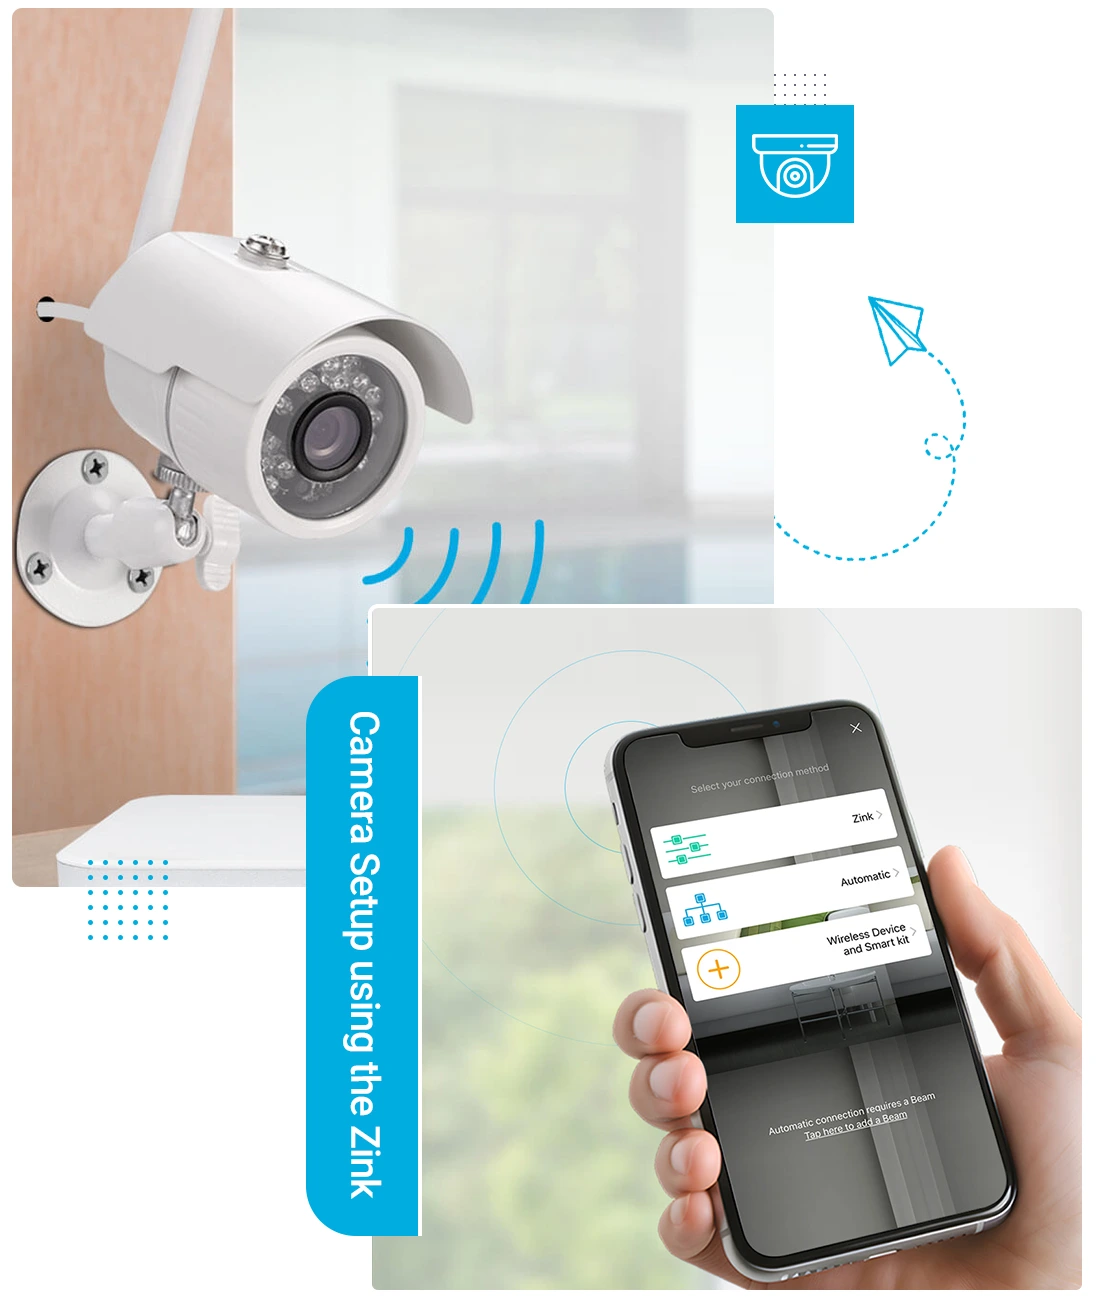
Zmodo Camera Setup Using the Zink
- To begin with, ensure your camera is powered on and within the router’s network range.
- Now, connect the smartphone to the existing home network by visiting the wifi settings of it.
- Next, open the Zmodo app and access the admin account using your valid admin details.
- If you do not have the app, then install it and create a new account first, or use your email to register on the app.
- After logging in, go to the Device List>Add Camera/+icon>Select Zink Setup.
- Hereon, the window prompts you to join the available network and shows you the list.
- Further, click on the “Tap here to select wifi” and choose your home network.
- If you’re joining a Beam, link to the SSID called “AP_ZMD”. If you’re linking any other ‘Zink’ WiFi gadget, then connect to the SSID called ‘ZMD_SAP’.
- Afterward, type in the SSID name and password for the selected network.
- Ensure that the WiFi network is selected to the 2.4 GHz frequency.
- Now, Zink will automatically locate and connect your security device to the network and you can access your camera settings completely.
- At last, give a name to your camera and you are done with the Zmodo camera wireless setup.
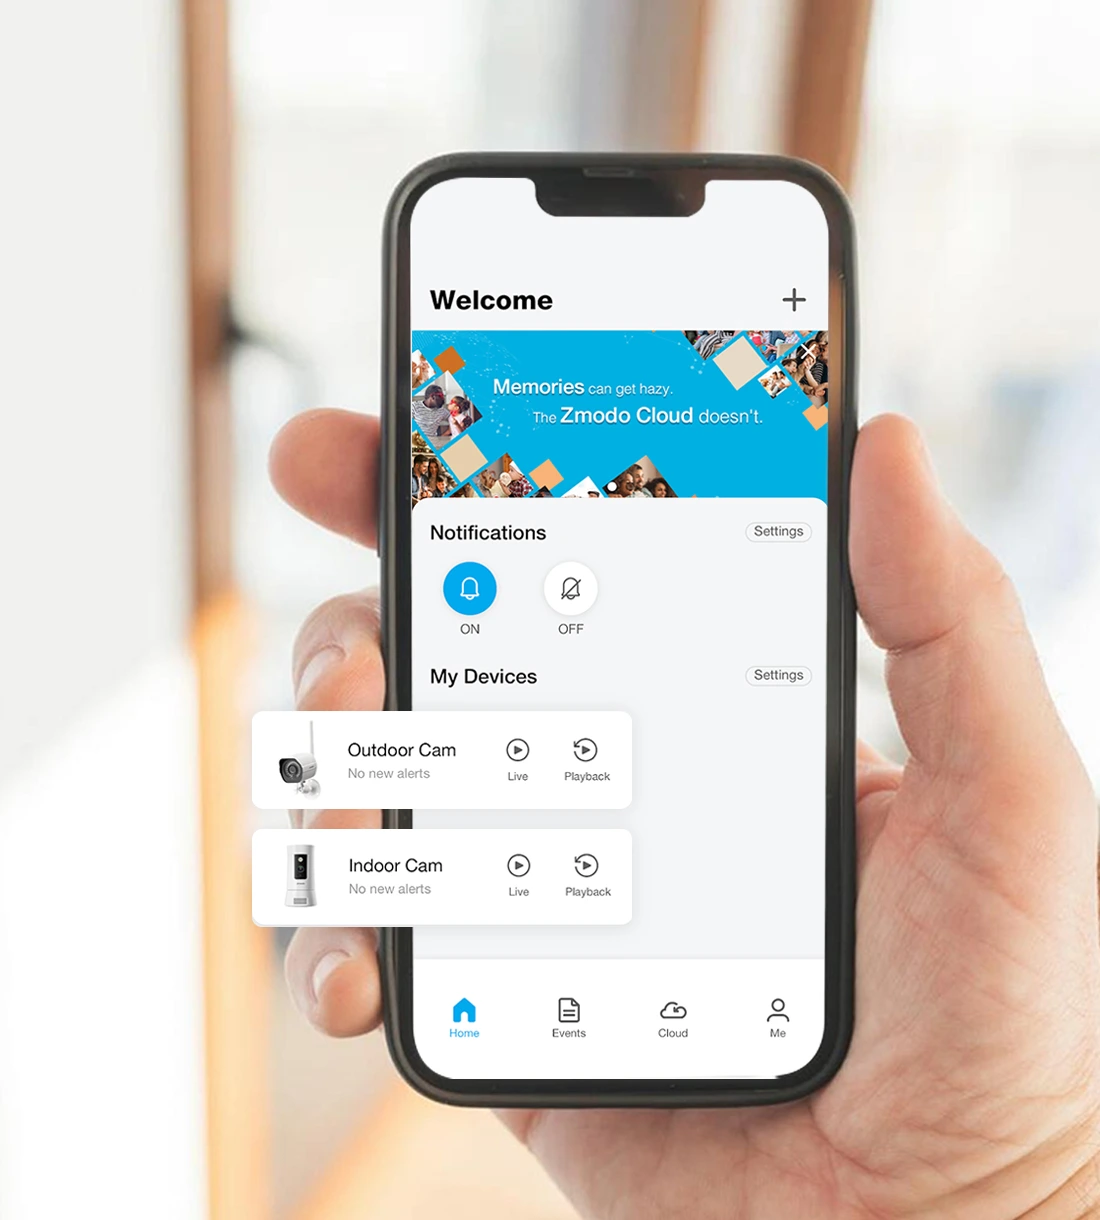
Camera Configuration Directly Through the Zmodo App
- Initially, check that you have an upgraded version of the Zmodo app on your smartphone.
- Now, connect the smartphone to the available home network.
- After that, launch the app and access the app account by entering the admin username and password.
- If you don’t have the app, download it, sign up for the new account, or use your email address.
- Hereon, you reach the advanced Home dashboard of the security camera.
- Next, visit the Device List>Add Camera/+ icon>Wireless Device.
- Follow the further instructions to go ahead with the configuration procedure.
- Now, select the number of security devices that you are going to configure.
- Afterward, mention your home network’s SSID name and password when prompted.
- Further, you are shown as Power on your device, and then check that your camera is powered on and wait till it connects you to the wireless network.
- When your security device joins the network, then you are advised to give the name to your camera and set the time zone according to your location.
- Finally, your Zmodo surveillance device is ready to use.
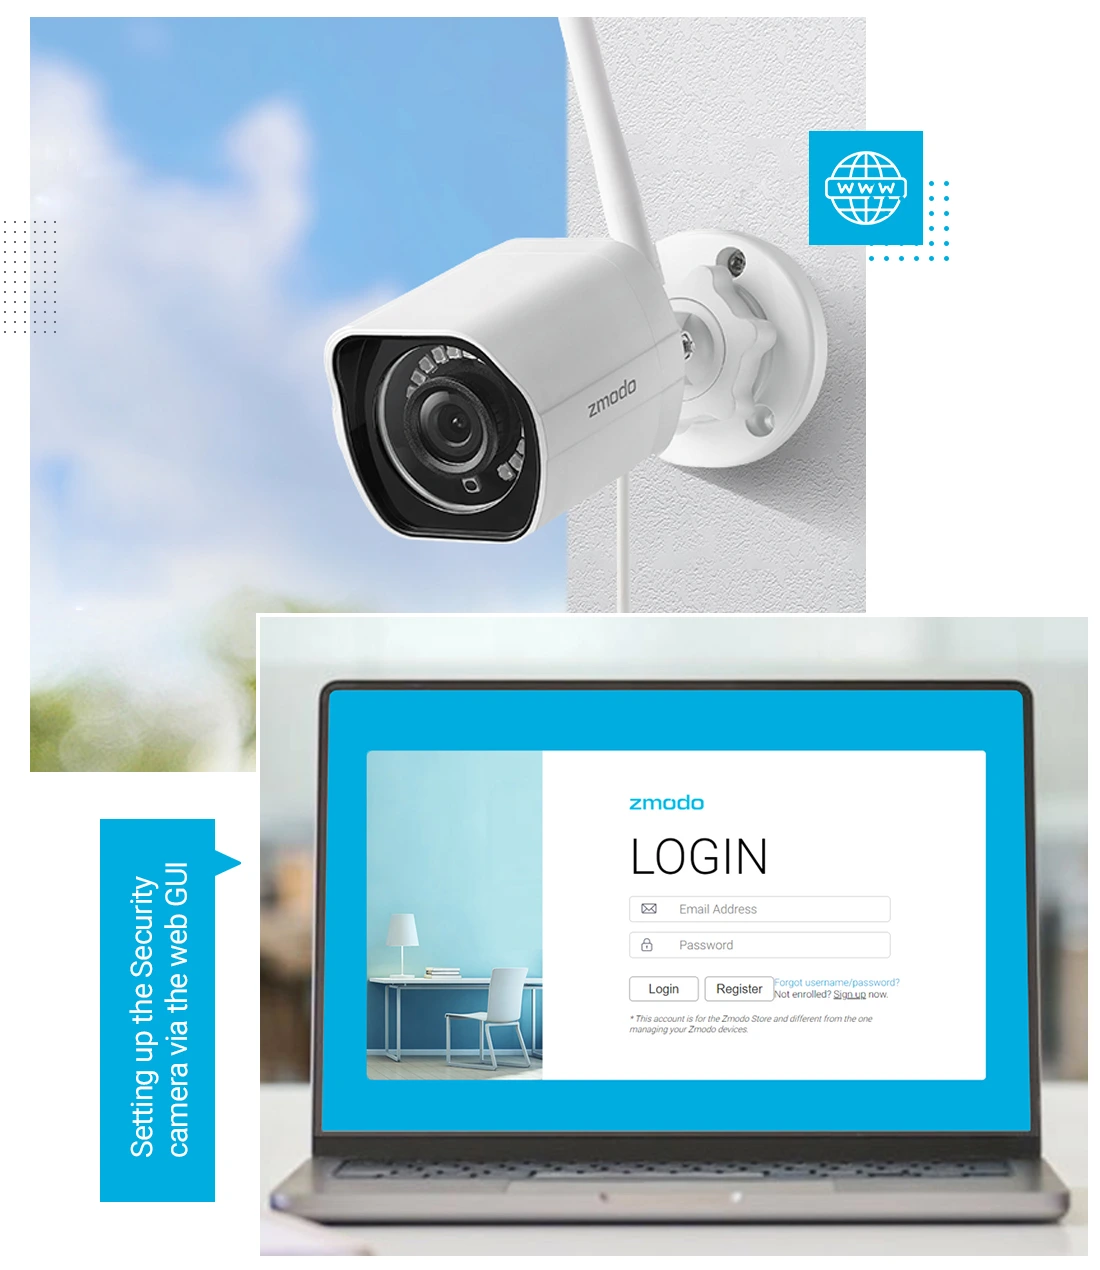
Setting up the Security Camera Via the Web GUI
- At the start, make sure your Zmodo security cameras are turned on.
- Now, connect the computer to the existing home network.
- After that, open the web browser and type the user.zmodo.com web address in the browser bar.
- Hereon, mention the admin login details on the login window that appears to you.
- If you didn’t set up the user account earlier, then type this web address and you reach the Zmodo site.
- Here, click on the Zmodo app, download it, and create an admin account first.
- After logging in, you reach the smart Home dashboard of the surveillance device.
- Now, click on the Device List>Add Camera> +icon> Choose the Zmodo camera setup
- Further, follow the on-screen instructions to complete the camera configuration.
- Lastly, your camera is linked to the available network and gives the name to your camera.
- Now, you can configure the motion detection, Armed/Disarmed, Time Zone, etc. settings.
Explain the Easy Troubleshooting Methods to Resolve Zmodo Camera Wireless Setup Issues.
Furthermore, in the process of wireless or Zmodo wired camera setup, users sometimes get stuck. This generally happens to the newbies or if there is a technical glitch with your surveillance device. The issues may arise commonly due to incorrect web/login details, an unstable network, a power outage, and more.
Therefore, it is necessary to resolve these problems timely for the optimal camera functioning. So, in this section, we share the effective troubleshooting methods to fix the Zmodo camera setup issues, have a look:
- Make sure you are using a stable wireless network, if face issues, then use Ethernet cables to stabilize the internet.
- Cross-verify the admin details before you enter them into the login window.
- Eliminate the signal barriers such as EMV devices, mirrors, furniture, etc.
- Place the camera within the router’s network range away from the other radio frequencies.
- Ensure that you are using the upgraded version of the Zmodo app and that your smartphone/Windows is compatible with the app and web address.
- Remove the web browser issues and update it if available.
- If the given web address is not supported by the current browser, then shift to another one.
- To resolve the technical glitches and bugs, power cycle your camera and the base station.
- Temporarily disable the security extensions, such as VPN/AD Blocker/Firewall, etc.
- If the connection drops off frequently, then position the camera closer to the router/mesh wifi/extender that you use.
- Check the camera settings and configure them to the recommended levels, such as motion and sensitivity settings, night vision, and more.
- If none of the given methods work, then factory reset the camera. Keep in mind it reverts your surveillance device to the default settings and you have to reconfigure it.
All in all, here you find deep insights for the easy Zmodo Camera Setup, using different methods. If face issues, then suitable troubleshooting methods are also explored on this page. If you are still seeking more information, then stay tuned to us!